


“The Oracle Database Appliance saves time and money by simplifying deployment, maintenance, and support of database solutions for organizations of every size. Optimized for the world’s most popular database–Oracle Database–it integrates software, compute, storage, and network resources to deliver database services for a wide range of custom and packaged online transaction processing (OLTP), in-memory database, and data warehousing applications. All hardware and software components are engineered and supported by Oracle, offering customers a reliable and secure system with built-in automation and best practices. In addition to accelerating the time to value when deploying database solutions, the Oracle Database Appliance offers flexible Oracle Database licensing options and reduces operational expenses associated with maintenance and support.

All Oracle Database Appliance Models are optimized to run Oracle Database Standard Edition and Enterprise Edition. The Oracle Database Appliance X7-2S and Oracle Database Appliance X7-2M are ideal for customers who require single instance databases on an engineered platform. The Oracle Database Appliance X7-2-HA is ideal for customers who are looking to consolidate multiple databases onto a highly available and scalable-engineered platform.
In this blog post, I want to write step by step documentation for Oracle Database Appliance (ODA) Installation, Configuration and Deployment. The installation of Oracle Database Appliance (ODA) is very easy and done by the ODA configuration manager. After filled out all the necessary information in the ODA configuration manager screens, you will click the “install” button, and the installation progress will start. It is 33 steps and each of them executes some commands/scripts in the background. You can see all the detailed status of each steps in the ODA configuration manager screen.
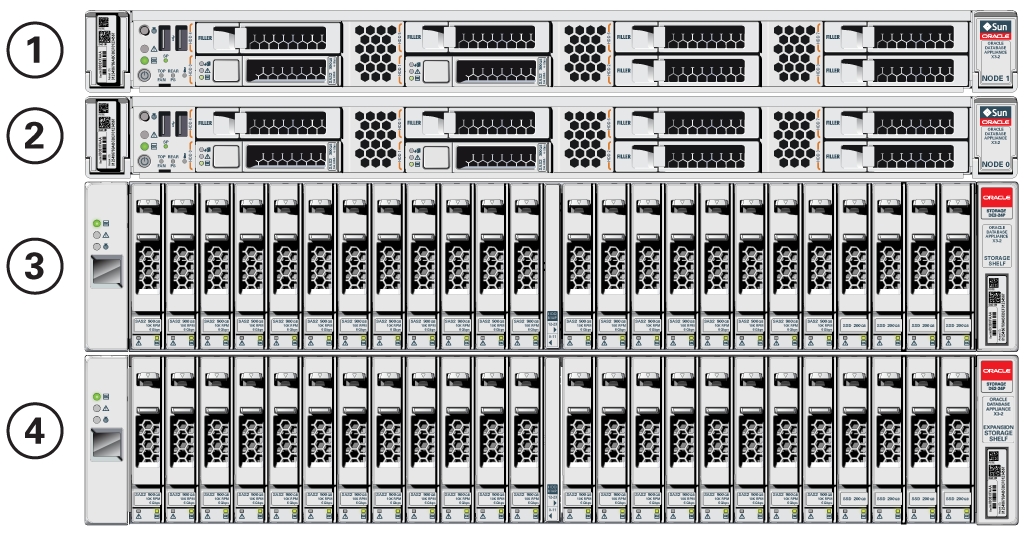
ODA is x86 based engineered system. The minimum SW release for ODA X6-2 is version 12.1.2.7.0. The Oracle Database Appliance X6-2 can only be deployed as a Non-Virtualized (Bare Metal) Configuration. The Bare Metal image will be installed by the factory. For the latest ISO images, check My Oracle Support, Patches & Updates tab. The ODA X6-2 images are listed under patches for Oracle Database Appliance Software, and clearly marked for ODA X6-2. Since you will not know which version is installed on the ODA before proceeding with the installation it is recommended to download all the patches that might be needed to save a lot of download time whilst at the customer site. It is strongly recommended that you access MOS Document ID 888888.1 which contains links to the above patches. The downloaded files can be copied onto a USB stick for access by the system.
DOWNLOADING NECESSARY PATCHES
Download the following files (where xxxxxx represents the current version
number e.g. 121280 for ODA SW 12.1.2.8.0):
• p23530609_xxxxxx_Linux-x86-64.zip – ODA ISO Bare Metal Restore
file – only be necessary if a complete re-image is required.
• p23494985_xxxxxx_Linux-x86-64.zip – (two parts 1of 2 and 2of 2) GI
Clone files. This file is required for deployment.
• p24391219_121280_Linux-x86-64.zip – ODA Patch Bundle
Depending on the version of the database that the customer would like to
provision, you can download both of them, or either one of the following two
patches:
• p23494992_xxxxxx_Linux-x86-64.zip – (two parts 1of 2 and 2of 2)
These clone files are for creating a new database home running
12.1.0.2.160719 DBBP. (DBBP – Database Bundle Patch).
• p23494997_xxxxxx_Linux-x86-64.zip
These clone files are for creating a new database home running
11.2.0.4.160719 DBBP. (DBBP – Database Bundle Patch).
If you are using a KVM or directly attached monitor and keyboard, the ILOM may be configured using the web configurator. This will save the task of connecting to the serial port to configure the ILOM net management port manually. When the SP initially boots it will attempt to obtain an IP address from a DHCP server. You must have a cable connected to the SP Network Management port (NET MGT). If DHCP server is available you can connect to the SP via network (ssh or https), otherwise you have to connect to the SP via a serial line (see below) and specify a static Ethernet configuration.
Obtain the Service Processor IP address from one of the following locations. Record the IP address for future reference:
• The system BIOS setup screen.
• Command-line interface – connect to serial port via terminal device (such as a laptop). Log into the SP via CLI and display the IP address.
This will be the address assigned by the DHCP server.
Advanced → BMC Network Configuration →Current Ipv4 address in BMC
SERVER POWER ON
Power on the server. There are several ways to do this:
• Press the power-on button on the front panel (with clock symbol).
• From the CLI on the SP issue: start /SYS
-> start /SYS
• On the ILOM GUI expand the Host Management link in the left column then select Power Control. In the Main panel you will see Host is currently off Select Power On and then save.
If using CLI: gain host console access. To stop the host console press ESC followed by ( i.e. opening round bracket. To leave the secure shell: exit
From server’s SP:
-> start /HOST/console
At the OS login prompt:User root with welcome1 as password.
CONFIGURING ILOM VIA CLI AND A SERIAL CONNECTION
To set a static IP address for the SP using the CLI and a serial line connection perform the steps below.
Log in to the ILOM SP.
User = root
Pwd = changeme
login as: root
Using keyboard-interactive authentication.
Password:
Oracle(R) Integrated Lights Out Manager
Version 3.2.7.26 r112010
Copyright (c) 2016, Oracle and/or its affiliates. All rights reserved.
Warning: password is set to factory default.
Warning: HTTPS certificate is set to factory default.
Hostname: oda-x6-m-ilom-> ls
/
Targets:
HOST
System
SPProperties:
Commands:
cd
show-> cd SP
/SP-> ls
/SP
Targets:
alertmgmt
cli
clients
clock
config
diag
faultmgmt
firmware
logs
network
policy
powermgmt
preferences
serial
services
sessions
usersProperties:
check_physical_presence = true
current_hostname = oda-x6-m-ilom
hostname = oda-x6-m-ilom
reset_to_defaults = none
system_contact = (none)
system_description = ORACLE SERVER X6-2, ILOM v3.2.7.26, r112010
system_identifier = Oracle Database Appliance X6-2 Medium 1639NM10PK
system_location = (none)Commands:
cd
reset
set
show
version-> cd network
/SP/network-> ls
/SP/network
Targets:
interconnect
ipv6
testProperties:
commitpending = (Cannot show property)
dhcp_clientid = none
dhcp_server_ip = none
ipaddress = 192.168.3.101
ipdiscovery = static
ipgateway = 192.168.3.1
ipnetmask = 255.255.255.0
macaddress = 00:10:E0:BD:C8:20
managementport = MGMT
outofbandmacaddress = 00:10:E0:BD:C8:20
pendingipaddress = 192.168.3.101
pendingipdiscovery = static
pendingipgateway = 192.168.3.1
pendingipnetmask = 255.255.255.0
pendingmanagementport = MGMT
pendingvlan_id = (none)
sidebandmacaddress = 00:10:E0:BD:C8:21
state = ipv4-only
vlan_id = (none)Commands:
cd
set
show-> set pendingipdiscovery = static
-> set pendingipaddress = 192.168.3.101
-> set pendingipgateway = 192.168.3.1
-> set pendingipnetmask = 255.255.255.0
-> set commitpending = true
-> set state = enabled
-> ls–Booting
start /SYS
or
Press the power-on button on the front pane
Note that the commitpending command requires several seconds to complete. It is also possible to configure ILOM network settings via the system BIOS in the Advanced Menu tab under BMC Network.
Verify the changes.
-> show /SP/network
CONFIGURING ILOM VIA GUI & ETHERNET CONNECTION
To set a static IP address for the SP using the GUI perform the steps below.
1- Determine the current IP address of the SP using one of the methods described at the top of this page. For this to work IP assignment by DHCP must have succeeded!
2- Connect to the SP via a web browser running on a remote system (Firefox or Internet Explorer).
3- Log into the web GUI using the default user name & password.
https://192.168.3.101
User = root
Pwd = changeme
4- Select ILOM Administration and then Connectivity to display information about the current network configuration of your ILOM. The network configuration can be modified then press the Save button.
CONFIGURING THE NETWORK INTERFACE
Run the command configure-firstnet. Respond to the prompts to configure the public network interface. Also provide the netmask and gateway IP address.
[root@oak ~]# configure-firstnet
Select the Interface to configure the network on (btbond1 btbond2
sfpbond1) [btbond1]:
Configure DHCP on btbond1 (yes/no) [no]:
INFO: You have chosen Static configuration
Enter the IP address to configure : 192.168.3.102
Enter the Netmask address to configure : 255.255.252.0
Enter the Gateway address to configure[192.168.3.1] :
INFO: Plumbing the IPs now
INFO: Restarting the network
Shutting down interface btbond1: [ OK ]
Shutting down interface btbond2: [ OK ]
Shutting down interface p3p1: [ OK ]
Shutting down interface p3p2: [ OK ]
Shutting down interface sfpbond1: [ OK ]
Shutting down loopback interface: [ OK ]
Bringing up loopback interface: [ OK ]
Bringing up interface btbond1: Determining if ip address
192.168.3.102 is already in use for device btbond1…
[ OK ]
Bringing up interface btbond2: [ OK ]
Bringing up interface sfpbond1: [ OK ]
To verify the current ODA system version, run the following command:
[root@oak ~]# cat /opt/oracle/oak/pkgrepos/System/VERSION
version=12.1.2.8.0
To re-image with a newer version, you will require the Bare Metal ISO image. The file can be unzipped on a Linux.
# unzip p23530609_xxxxxx_Linux-x86-64.zip
UPLOADING PATCHES TO THE SERVER NODE
Now that you have an active network interface, you can use scp/ftp/filezilla to transfer the following files to the server node.
p23494997_121280_Linux-x86-64.zip –> 11.2.0.4 RDBMS
p23494992_121280_Linux-x86-64.zip –> 12.1.0.2 RDBMS
p23494985_121280_Linux-x86-64_2of2.zip –> grid
p23494985_121280_Linux-x86-64_1of2.zip –> grid
p23530609_121280_Linux-x86-64 –> OS image
UNPACK/CONCATENATE AND INSTALL THE GI PATCH
[root@oak ~]# unzip p23494985_121280_Linux-x86-64_1of2.zip
[root@oak ~]# unzip p23494985_121280_Linux-x86-64_2of2.zip
[root@oak A]# ls
oda-sm-12.1.2.8.0-160817-GI-12.1.0.2_1of2.zippart p23494985_121280_Linux-x86-64_1of2.zip p23494992_121280_Linux-x86-64.zip README.html
oda-sm-12.1.2.8.0-160817-GI-12.1.0.2_2of2.zippart p23494985_121280_Linux-x86-64_2of2.zip p23494997_121280_Linux-x86-64.zip
[root@oak A]# cat oda-sm-12.1.2.8.0-160817-GI-12.1.0.2_1of2.zippart oda-sm-12.1.2.8.0-160817-GI-12.1.0.2_2of2.zippart > GI.zip
Apply the update:
[root@oak A]# update-image –image-files GI.zip
Unpacking will take some time, Please wait…
Unzipping GI.zip
UNPACK/CONCATENATE AND INSTALL THE DATABASE PATCH
There are 2 database versions that can be provisioned:
• 12.1.0.2.160719 DBBP (database bundle patch)
• 11.2.0.4.160719 DBPSU (database PSU)
Depending on the version of the database that you would like to provision, you can install both, or either one of them. The below example is for 12.1.0.2, which only has one file and did not need to be concatenated like the GI patch. If the patch comes with two files, they must first need to be concatenated before installing with the image-update command:
[root@oak ~]# unzip p23494992_121280_Linux-x86-64.zip
[root@oak ~]# update-image –image-files oda-sm-12.1.2.8.0-160817-DB-12.1.0.2.zip
Unpacking will take some time, Please wait…
Unzipping oda-sm-12.1.2.8.0-160817-DB-12.1.0.2.zip
DEPLOYING THE ORACLE DATABASE APPLIANCE
You are now ready to deploy the Oracle Database Appliance. Using the Chrome or IE browser, enter the following URL:
1- https://192.168.3.102:7093/mgmt/index.html
Username: oda-admin
Password (default):welcome1
 2- On the first screen, click on Create Appliance
 3- Mandatory fields have star sign *. The hostname can contain alphanumeric characters and dashes (-). The hostname cannot exceed 63 characters. The password must begin with an alpha character and cannot contain quotation marks. The password cannot exceed 30 characters.

4- Write Client Access Network inf.

5- Database information details

6- If Yes, ASR User Name and Password is required. If Yes to HTTP Proxy, the Proxy Server Name and Proxy Port is required. If Yes to HTTP Proxy Requires Authentication, Proxy User Name and Proxy Password is required. Click NO and Submit button.

7- Select Yes

8- Provisioning job will submitted. Click the link to display job details.

9- Provisioning service creation steps. To monitor deployment progress, you can monitor the dcs-agent.log file:
# tail -f /opt/oracle/dcs/log/dcs-agent.log
If there is an error during deployment, we will see it in the dcs-agent.log file


It is ready to use.
[root@dbmaster ~]# su – oracle
oracle@ dbmaster /home/oracle>
oracle@ dbmaster /home/oracle>
oracle@ dbmaster /home/oracle> sqlplus / as sysdbaSQL*Plus: Release 12.1.0.2.0 Production on Tue Feb 20 22:22:08 2018
Copyright (c) 1982, 2014, Oracle. All rights reserved.
Connected to:
Oracle Database 12c Enterprise Edition Release 12.1.0.2.0 – 64bit Production
With the Partitioning, Automatic Storage Management, OLAP, Advanced Analytics
and Real Application Testing optionsSQL> select name,log_mode,open_mode from v$database;
NAME LOG_MODE OPEN_MODE
——— ———— ——————–
dbmaster ARCHIVELOG READ WRITESQL> select name from v$datafile;
NAME
——————————————————————————–
+DATA/dbmaster/DATAFILE/system.261.968623315
+DATA/dbmaster/DATAFILE/sysaux.260.968623281
+DATA/dbmaster/DATAFILE/undotbs1.259.968623279
+DATA/dbmaster/DATAFILE/users.262.968623351[root@dbmaster ~]# su – grid
grid@ dbmaster /home/grid>
grid@ dbmaster /home/grid> asmcmd lsdg
State Type Rebal Sector Block AU Total_MB Free_MB Req_mir_free_MB Usable_file_MB Offline_disks Voting_files Name
MOUNTED NORMAL N 512 4096 4194304 4894016 4879956 0 2434880 0 Y DATA/
MOUNTED NORMAL N 512 4096 4194304 1231176 1218588 0 604180 0 N RECO/
grid@ dbmaster /home/grid>[root@dbmaster ~]# /opt/oracle/dcs/bin/odacli list-databases
ID DB Name DB Version CDB Class Shape Storage Status
—————————————- ———- ——————– ———- ——– ——– ———- ———-
e2292352-b538-4d79-8a70-e1cc9a0c18b7 dbmaster 12.1.0.2 false OLTP odb6 ASM Configured[root@dbmaster ~]# /opt/oracle/dcs/bin/odacli describe-appliance
Appliance Information
—————————————————————-
ID: 71358f0e-d684-44f0-9e74-d8436e0a6778
Platform: OdaliteM
Data Disk Count: 2
CPU Core Count: 20
Created: February 20, 2018 9:39:24 PM EETSystem Information
—————————————————————-
Name: dbmaster
Domain Name:
Time Zone: Europe/Istanbul
DB Edition: EE
DNS Servers: 192.168.3.29
NTP Servers: 192.168.3.29Disk Group Information
—————————————————————-
DG Name Redundancy Percentage
————————- ————————- ————
Data Normal 80
Reco Normal 20[root@dbmaster ~]#